

How to Build a Backpacking Sleep System: 7-Step Guide
Oct 24 , 2026
Table of Contents
- Step 1: Know the Four Parts of a Backpacking Sleep System
- Step 2: Match Your Insulation to the Expected Low Temperature
- Step 3: Use a Backpacking Sleeping Pad R-value Guide to Pick Your Ground Insulation
- Step 4: Quilt vs Sleeping Bag for Backpacking: Choose Your Top Insulation
- Step 5: Backpacking Sleep System Weight Optimization Without Losing Warmth
- Step 6: Check Compatibility, Sizing, and How the Pieces Layer Together
- Step 7: Manage Moisture, Pick Your Campsite, and Field-Test the System
- Troubleshooting a Sleep System That Feels Cold
- Frequently Asked Questions
Last Updated: October 19, 2026
Step 1: Know the Four Parts of a Backpacking Sleep System
A backpacking sleep system is four components: top insulation (a sleeping bag or quilt), bottom insulation (a sleeping pad), a shelter that blocks wind and precipitation, and accessories that seal the gaps between them.

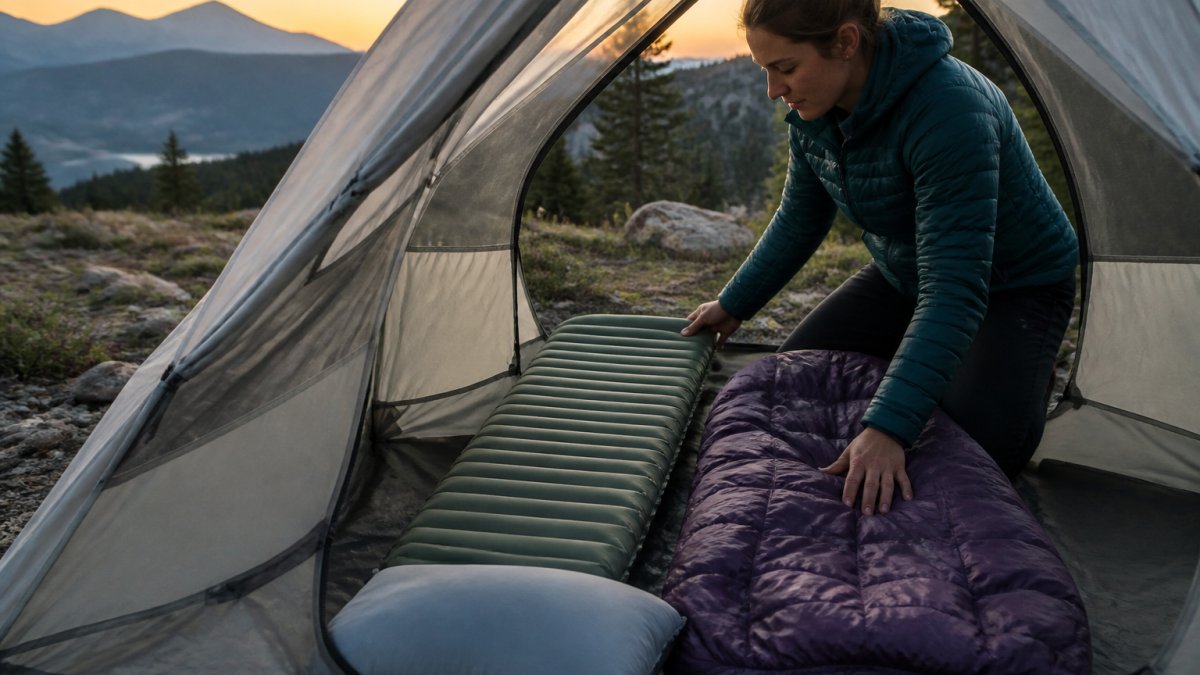
At Wild For Wellness Co, we see the same pattern in customer questions: people buy an excellent bag, pair it with a thin foam pad, and then wonder why they shiver at 4 a.m.
Here is what each piece actually does:
- Top insulation traps the heat your body radiates. A sleeping bag encloses you; a quilt drapes over you and saves weight by cutting the material underneath, which a pad already insulates.
- Bottom insulation stops your body heat from draining into cold ground. This is the piece most beginners underestimate, and it matters more than the bag on frozen ground.
- Shelter keeps wind, rain, and condensation off the system. A tent does not add much warmth, but wind stripping heat off your bag makes a warm night feel cold fast.
Step 2: Match Your Insulation to the Expected Low Temperature
Match your insulation to the coldest temperature you realistically expect, not the average. Check a forecast for the specific elevation and season, then add a margin of roughly 5 to 10 degrees Celsius below that expected low.
A Practical Temperature-Based Decision Framework
A better approach than a simple table is a three-step decision: start with the forecast low, adjust for how you sleep, then add a safety margin.
Step 1: Find your baseline. Look up the forecast low for the specific elevation and season you are camping in.
Step 3: Add a safety margin. Add another 5°C below your adjusted low to cover cold snaps, damp insulation, and fatigue.
Use this decision framework before you buy or pack anything:
| Expected Overnight Low | Top Insulation (average sleeper) | Pad Target | Extras to Pack |
|---|---|---|---|
| 15°C and above | Light quilt or liner | Closed-cell foam or basic air pad (R-value 1-2) | Bug net, thin base layer |
| 5°C to 15°C | Three-season bag or quilt (comfort rating 0°C to 5°C) | Insulated pad, R-value 3-4 | Beanie, warm socks |
| -5°C to 5°C | Warmer three-season or cold-weather bag (comfort rating -5°C to 0°C) | Well-insulated pad, R-value 4-5 | Liner, sleep clothes, hooded layer |
| Below -5°C | Winter-rated bag or layered quilts (comfort rating -10°C or lower) | High R-value pad (5+), possibly doubled | Full sleep layers, insulated bottle |
Why the Safety Margin Matters
Ratings are tested with a standard mannequin wearing a base layer and a hat, on a pad with a specific R-value, your body, clothing, and pad may not match those assumptions. Adding 5-10°C of margin closes that gap.
Step 3: Use a Backpacking Sleeping Pad R-value Guide to Pick Your Ground Insulation
A backpacking sleeping pad R-value guide comes down to one number: R-value measures a pad's resistance to heat loss, and higher means warmer. Aim for around 2 for mild summer nights, 3 to 4 for three-season backpacking, and 5 or above for snow and hard cold. These are practical targets, not official thresholds, adjust for how cold you sleep.
Air Pad, Closed-Cell Foam, or Both
Air pads pack small and sleep comfortably, but uninsulated ones feel cold because air moves inside them; insulated air pads solve that with internal baffles or reflective layers.
For car camping or base camps where weight is not the constraint, our Matrix Air-Cell Memory Foam Camping Mattress offers pressure relief and a waterproof cover. It is not a backpacking pad, and we would not pretend otherwise.

Step 4: Quilt vs Sleeping Bag for Backpacking: Choose Your Top Insulation
The quilt vs sleeping bag for backpacking decision hinges on how you sleep and how much weight you will trade for convenience. A quilt saves weight and suits back and stomach sleepers. A sleeping bag offers full enclosure, a hood, and simpler draft management, which many cold sleepers and side sleepers prefer.
Down, Synthetic, and How Temperature Ratings Actually Work
Down delivers the best warmth-to-weight ratio and packs small, but loses loft when wet. Synthetic keeps more warmth when damp and dries faster, which matters on multi-day trips in wet climates.
Temperature ratings deserve skepticism. A comfort rating describes the temperature at which an average sleeper stays comfortable, while a lower limit rating describes survival-level warmth. Plan around the comfort rating; if you sleep cold, add a margin.
For tall or broad campers, fit is a warmth issue, not just a comfort one. Our XXL Sleeping Bag for Big and Tall Campers is built with extra room so bigger sleepers can move without flattening the insulation.
Step 5: Backpacking Sleep System Weight Optimization Without Losing Warmth
Backpacking sleep system weight optimization is about cutting grams that do not buy warmth, not shaving insulation you need. The biggest wins: switching from a bag to a quilt, choosing a pad with a better warmth-to-weight ratio, and leaving duplicate accessories behind.
Work through these in order:
Matrix Air-Cell Memory Foam Camping Mattress →
- Weigh each component separately. Most people are surprised which piece is heaviest.
- Compare warmth-to-weight, not raw weight. A slightly heavier pad with a higher R-value can replace a lighter pad plus a foam layer.
- Cut duplicate accessories. A liner, a pillow, and a sleep layer often overlap in function.
- Downsize the pack volume too. A quilt and a small pad free up space that a bulky bag eats.
A poncho liner is a good example of a multi-use item that earns its place. Our USGI M81 Woodland Poncho Liner traps body heat even when wet and dries quickly, serving as a warm-weather top layer or an extra layer inside a colder system.

Step 6: Check Compatibility, Sizing, and How the Pieces Layer Together
Compatibility failures cause more cold nights than bad gear does, a quilt that slides off an air pad at 2 a.m. is worse than a slightly heavier bag. Check three things: pad width against your shoulders, quilt or bag attachment points, and whether your shelter leaves room for the system to loft without touching the walls.
Pad Width, Quilt Attachment, and Sleeping-Bag Dimensions
Pad width vs. shoulder width. A pad narrower than your shoulders lets cold air in at the edges, especially if you sleep on your side.
Quilt attachment systems. Quilts save weight by removing insulation underneath, but that only works if the quilt stays attached to the pad.
Sleeping-bag dimensions. A bag that is too short compresses insulation at your feet; too narrow compresses it around your shoulders and hips. For tall or broad campers, a bag with extra room (like our XXL Sleeping Bag for Big and Tall Campers) is a warmth decision, not just a comfort one.
Shelter space and loft. Your shelter needs room for your bag or quilt to loft fully, if the bag touches the tent wall, condensation wets the insulation and reduces its warmth.
Liners, Pillows, and Sleep Clothes
Layer the small pieces deliberately:
- Pad attachment straps keep a quilt from shifting and stop drafts along the sides. If your pad lacks attachment points, you can sometimes add aftermarket loops, but check compatibility first.
- A sleeping bag liner adds a few degrees of warmth and keeps the bag cleaner. Silk liners are lightest; fleece liners are warmer but heavier.
- A camp pillow supports your neck so you actually rest, and it is worth the small weight. If you use a quilt, a pillow also helps seal the gap at the top where cold air can enter.
- Sleep clothes should be dry and dedicated. Wearing the day's damp hiking layers into a bag is the fastest way to sleep cold.
Step 7: Manage Moisture, Pick Your Campsite, and Field-Test the System
Moisture management decides whether a good system stays warm on night three.
Campsite selection is free warmth. Pitch on dry, sheltered ground away from exposed ridges and valley bottoms where cold air pools, and use a groundsheet to block moisture wicking up from the soil.
Field-test before a big trip. Sleep in the system in your yard or on a short local trip, note where you feel cold, and adjust one piece at a time.
Troubleshooting a Sleep System That Feels Cold
If your sleep system feels cold, work through the causes in order of likelihood: cold from the ground, drafts at the edges, damp insulation, or an overestimated rating.
Run this checklist:
- Is the pad's R-value matched to the ground temperature, not the air temperature?
- Is there a gap at your shoulders or feet where cold air enters?
- Did moisture build up in the bag or on the pad?
- Are you wearing dry sleep clothes and a warm hat?
Fix the ground insulation first, seal the drafts second, and only then consider a warmer bag. In practice, most people solve a cold night by adding a foam layer under the pad or tightening the quilt attachment.
Frequently Asked Questions
What is the best backpacking sleep setup?
There is no single best setup, only one matched to your conditions. A reliable starting point is an insulated air pad with an R-value around 3 to 4, a sleeping bag or quilt rated about 5 to 10 degrees below the lowest temperature you expect, and a camp pillow plus a dry layer to sleep in. From there, adjust for your sleep style: side sleepers need a thicker pad, and cold sleepers should size up on insulation rather than shivering through the night.
How do you choose the right R-value for a sleeping pad?
Match R-value to the ground temperature, not the air temperature. For three-season backpacking above freezing, an R-value of 2 to 3 works. For frosty spring and autumn nights, aim for 3 to 4. For snow or cold-weather camping, go 5 or higher. If you use a closed-cell foam pad under an air pad, the R-values add together, so a thin foam layer is a cheap way to lift a summer pad into shoulder-season use.
What is the difference between a quilt and a mummy bag?
A quilt has no bottom insulation because your pad already handles that job, which makes it lighter for the same warmth and easier to vent when you overheat. A mummy bag wraps insulation all the way around and seals in warmth with a hood, which suits cold sleepers and drafty conditions. Quilts work best when you have a pad with a solid R-value and use the attachment straps. Bags are simpler to get right on your first setup.
Is a 4lb sleeping bag too heavy for backpacking?
It depends on the trip. For car camping or short overnight hikes, 4lb is fine and often cheaper. For multi-day backpacking and thru-hikes, most hikers aim to keep bag or quilt weight under about 2 to 3lb, since every pound in your pack costs energy over long days. If your bag is heavy, offset it with a lighter pad and shelter first, then upgrade the bag when budget allows.
Building a sleep system that works in real conditions takes some thought, and getting the four parts to work together is where most people struggle. Wild For Wellness Co carries gear built for dependable performance in changing conditions, from the Matrix Air-Cell memory foam mattress for base camps to the USGI poncho liner for fast-and-light trips. Explore the range and build a system you can trust on the next trip.