

Bright Illumination for Low-Light Outdoor Recreation
Oct 29 , 2026
Last Updated: October 24, 2026
Quick Summary
To provide bright illumination for low-light outdoor recreation, match the light to the task rather than chasing maximum lumens: camp cooking needs 100-300 lumens of wide flood, hiking 200-500 lumens, and night biking 800+ lumens with a focused spot. Check runtime at the setting you will actually use, and pack two lights so one flood and one focused beam each do their own job.
- Beam distance sets how far you see, not lumens; a camp cook needs 3-5 metres.
- A 300-lumen flood aimed well beats a 1,000-lumen spot aimed badly almost every time.
- Plan battery life in nights: count nights, estimate 3-4 hours each, then double it.
- Keep spare cells and power banks in an inside pocket so cold nights do not drain them.
- Aim the beam at the ground a few metres ahead and shield the lens when passing campers.
Table of Contents
- Step 1: Match Bright Illumination to Your Activity
- Step 2: Read Fenix BC26R Brightness and Beam Distance Specs
- Step 3: Pick the Best Flashlight for Camping and Hiking
- Step 4: Plan Outdoor Flashlight Battery Life Around Your Trip
- Step 5: Direct Light Downward and Cut Glare
- Step 6: Choose Wildlife-Friendly Outdoor Lighting
- Common Mistakes to Avoid With Bright Illumination
- Frequently Asked Questions
Step 1: Match Bright Illumination to Your Activity
The right light level depends on what you're doing after dark: a camp lantern lights a table, a bike light cuts through rain at speed, a trail light shows roots before you trip.
Brightness alone tells you very little. What matters is how much light lands where you need it.
Bright illumination is usable light delivered to a surface or path, measured in lumens at the source and shaped by the beam.
Lumens measure total output; lux measures light hitting a surface; beam distance tells you how far it carries.
A Step-by-Step Method for Choosing Brightness
Work through these five questions in order.
- What is the farthest thing you need to see clearly? This sets beam distance, not lumens. A camp cook needs 3-5 metres. A hiker reading trail markers needs 15-30 metres. A cyclist at speed needs 30-50 metres or more.
- How wide does the lit area need to be? Cooking, tent setup, and map reading want a wide flood. Moving fast on a trail or road wants a narrower spot with a defined cut-off so you don't blind oncoming people.
- How long will the light run at that level? Check the runtime at the setting you'll actually use, not the peak. A light that only holds its brightest setting for 30-60 minutes is a sprint light.
- What is the ambient light? Under a full moon on open ground you need far less than under dense canopy or in rain and fog, where light scatters and effective reach drops.
- What is the worst condition you'll face? Cold, wet, and impact change the answer. A light that meets the first four questions but fails in the cold is the wrong light.
Lumens by Use Case: Camp, Trail, and Bike
| Activity | Typical Output | Beam Type | Priority |
|---|---|---|---|
| Camp cooking and tent setup | 100-300 lumens | Wide flood | Even coverage |
| Hiking a marked trail | 200-500 lumens | Mixed flood and spot | Near-field detail |
| Night biking | 800+ lumens | Focused spot | Distance and cut-off |
| Trail running | 300-600 lumens | Mixed, head-mounted | Stable beam, low bounce |
| Fishing or shore walking | 100-300 lumens | Flood with red mode | Preserved night vision |
| Emergency backup | 50-150 lumens | Flood | Long runtime |
Treat the numbers as starting ranges. A 300-lumen flood aimed well beats a 1,000-lumen spot aimed badly almost every time.
Why Lumens Alone Mislead
Two 500-lumen lights can behave completely differently.
Beam distance is usually quoted at roughly 0.25 lux, about moonlight, so a long number doesn't mean the whole path is brightly lit, only that a small spot is faintly visible that far away.
Backpackers planning low-light camp setups often want tent guidance first, since shelter choice affects where light hangs. Our best lightweight tent picks for backpacking cover that decision in more depth.
Step 2: Read Fenix BC26R Brightness and Beam Distance Specs
Spec sheets reward careful reading. The Fenix BC26R is built for cycling in low-light conditions, and its listing describes it as providing bright illumination for cycling after dark.
Here's what to check on any bike light listing:
- Output and runtime together. A high setting that lasts 40 minutes is a sprint setting, not a ride setting.
- Beam distance. This tells you how far the light reaches, not how wide it spreads.
- Beam pattern. A shaped beam keeps light on the road instead of in drivers' eyes.
Our full Fenix BC26R test covers how the light performs in practice. If the specs already fit your riding, you can view the Fenix BC26R bike light directly.

The same method works for any light: find the runtime at each output level, then pick the level you'll actually use.
Step 3: Pick the Best Flashlight for Camping and Hiking
The best flashlight for camping and hiking is one you'll carry every day and trust in bad weather: a rechargeable battery, an adjustable beam, and a body that survives a drop onto rock.
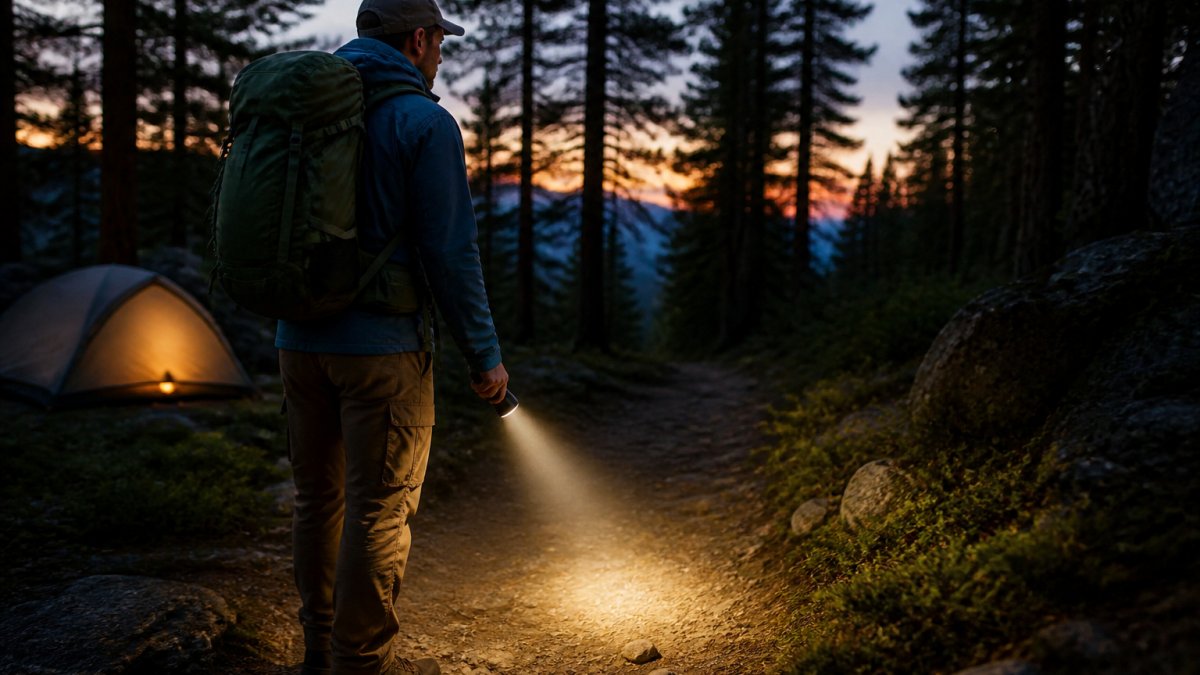
Our pick is the Fenix E35R rechargeable LED flashlight. It's compact, rechargeable, and built for camping, hiking, travel, and emergencies.

Lantern or Handheld: Which Fits Your Camp
A lantern lights a space. A handheld lights a direction. Most campers need both, but if you're buying one first, start with the lantern.
The Fenix CL26R PRO rechargeable camping lantern is portable and rechargeable, covering tents, campsites, and outdoor spaces. It frees your hands for cooking and setup, hang it, set it on a table, or carry it to the wash station.

Handheld lights win when you're moving. Lanterns win when you're stopped.
Step 4: Plan Outdoor Flashlight Battery Life Around Your Trip
Plan outdoor flashlight battery life in nights, not hours. Work out how many evenings you'll need light, then add a buffer for delays and early sunsets.
A simple method:
Fenix CL26R PRO Rechargeable LED High Performance Camping Lantern →
- Count your nights out.
- Estimate 3-4 hours of light per evening.
- Multiply for total hours needed.
- Double it for the buffer.
- Check the runtime at your usual output level, not the lowest one.
That gets you a number, but not how batteries behave in the field, where most lighting plans fail.
Cold, Heat, and Real-World Runtime
Lithium-ion cells lose usable capacity as temperatures drop: a light that runs four hours at room temperature may run noticeably shorter near or below freezing. The fixes are simple:
- Carry the light warm. Keep spare cells and power banks in an inside pocket, not an outer pack lid or a hip-belt pouch exposed to wind.
- Use lower settings in the cold. A dimmer setting draws less current and produces less internal heat demand, stretching usable runtime.
- Warm the cell before a high-output burst. If you need maximum output for a short stretch, keep the light close to your body until you do.
Heat is the opposite problem: running a high setting for a long time in warm weather can trigger thermal step-down, where the light reduces output to protect itself. That's normal, but it means the quoted peak is a short-duration figure.
Water, Dust, and Impact Ratings
An IP rating tells you how well a light resists water and dust; the first digit is solids, the second liquids. IPX4 handles splashes and rain from any direction, IPX7 survives temporary immersion.
Impact resistance is usually quoted as a drop height onto a hard surface. A 1-metre rating is fine for most camp use; a light carried on a bike or climbing harness should be rated higher, because it will hit rock and road, not turf.
Charging Logistics on Multi-Day Trips
Rechargeable lights remove the disposable-battery problem but add a charging problem. Plan for it:
- Match charging ports across your kit. A single USB-C cable and one power bank covering your light, phone, and headlamp is lighter and simpler than three proprietary chargers.
- Size the power bank to the job. Estimate the watt-hours your lights will consume over the trip and add margin for cold and for charging losses.
- Charge during the day, not at camp. Solar panels and power banks work best in daylight; relying on them after dark usually means starting the evening on a low battery.
A Field-Use Checklist
Before any trip where light matters, run through this list:
- Runtime at your real setting, checked, not assumed.
- Spare power, power bank or spare cell, sized to the trip.
- Cold plan, where warm cells live and how you'll keep them there.
Rechargeable designs suit multi-day trips, provided the charging plan is as considered as the light choice.
Step 5: Direct Light Downward and Cut Glare
Glare is light pointed at your eyes instead of your task. It ruins night vision and makes a bright light feel worse than a dim one. The fix is direction, not power.
DarkSky International's five principles for responsible outdoor lighting put it plainly: use only the light needed for the task, and aim it downward. That guidance applies to a headlamp on a trail as much as to a park fixture.
Practical steps for personal lights:
- Point the beam at the ground a few metres ahead, not at eye level.
- Use a lower setting when your eyes have adjusted to darkness.
- Shield the lens with your hand when passing other campers.
Research published in Scientific Reports on optimized outdoor lighting found that better light distribution reduces light trespass and improves uniformity across the lit area. Uniformity, not raw output, is what makes a space feel lit.
Step 6: Choose Wildlife-Friendly Outdoor Lighting
Wildlife-friendly outdoor lighting means keeping light on the ground, on the task, and on the hours you need it. It's a design choice, not a sacrifice.
A National Park Service summary of visitor lighting preferences reports that visitors supported lighting that benefits parks and wildlife over lighting that mimics daylight.
What that looks like in camp:
- Downward-directed light from a hung lantern instead of a wide flood.
- Warmer color temperatures where the fixture allows a choice.
- Motion or manual switching so light isn't running all night.
Light pollution carries real costs. A National Institutes of Health review of light pollution health effects describes inefficient or unnecessary artificial light as a pollutant with health implications.
Common Mistakes to Avoid With Bright Illumination
Most lighting problems come from five habits, each easy to fix.
- Chasing lumens. Higher output drains batteries and creates glare. Match the level to the task.
- Ignoring beam pattern. A tight spot at close range leaves your feet in shadow.
- Skipping the runtime check. Peak output rarely lasts a full evening.
Low-light conditions punish gear that looked fine in daylight. A light that dies on night two, or blinds you every time you check the trail, turns a good trip into a long walk in the dark. At Wild For Wellness Co, we stock rechargeable lighting built for changing conditions and demanding environments, including the Fenix E35R flashlight, the CL26R PRO lantern, and the BC26R bike light, each designed for dependable performance and all-day carry.
Frequently Asked Questions
How many lumens do you need for outdoor recreation at night?
Most camp tasks need 50 to 200 lumens, while trail walking and cycling benefit from 300 to 800 lumens directed ahead of you. The 2024 Journal of Environmental Psychology study on nighttime recreation found that adjusting light distribution and intensity may reduce barriers to getting outside after dark without reducing access. Start low and raise brightness only when the task demands it. DarkSky International's principles say light should be no brighter than necessary, so pick a light with multiple modes rather than one fixed high output.
What features matter most in a rechargeable outdoor flashlight?
Look for a rechargeable battery, several brightness modes, a beam pattern suited to your activity, and a body that handles rain and cold. Outdoor flashlight battery life matters more than peak lumens on multi-day trips, so check runtime at the level you will actually use. A compact handheld like the Fenix E35R covers camp and trail use at $71.95, while the Fenix CL26R PRO lantern at $71.95 spreads light across a tent or campsite. Both are rechargeable, which removes the cost and waste of disposable cells.
How can you reduce glare when using a bright light outdoors?
Point the beam at the ground a few metres ahead rather than at eye level, and use a lower mode when close to other people. A 2024 Scientific Reports article on optimized outdoor lighting found that better luminous distribution reduces light trespass and improves uniformity in the lit area. For camp use, a diffused lantern like the Fenix CL26R PRO spreads light evenly instead of throwing a harsh hotspot. Shield the source with your hand or a hood when you pass other campers.
What kind of outdoor lighting is wildlife friendly?
Wildlife-friendly lighting is downward-directed, no brighter than needed, and limited in duration. A 2024 National Park Service summary reported that visitors supported lighting benefiting parks and wildlife over lighting that mimics daylight. Choose warmer, lower-output modes, avoid shining lights into trees or water, and switch off when you do not need illumination. DarkSky International's principles echo this: use only the light required for the task, aim it down, and keep skyward illumination to a minimum.
